In order to successfully create a backup of your website, you will need the following information:
Required information:
- Website URL
- Hostname/IP address
- SFTP/FTP username
- SFTP/FTP password
- Port number
The steps required to obtain this information vary depending on the hosting provider. Most often, you will receive an email from your hosting provider containing this information when you first register or purchase a hosting package. However, if you are unsure what this information is or how to find it, please contact your hosting provider.
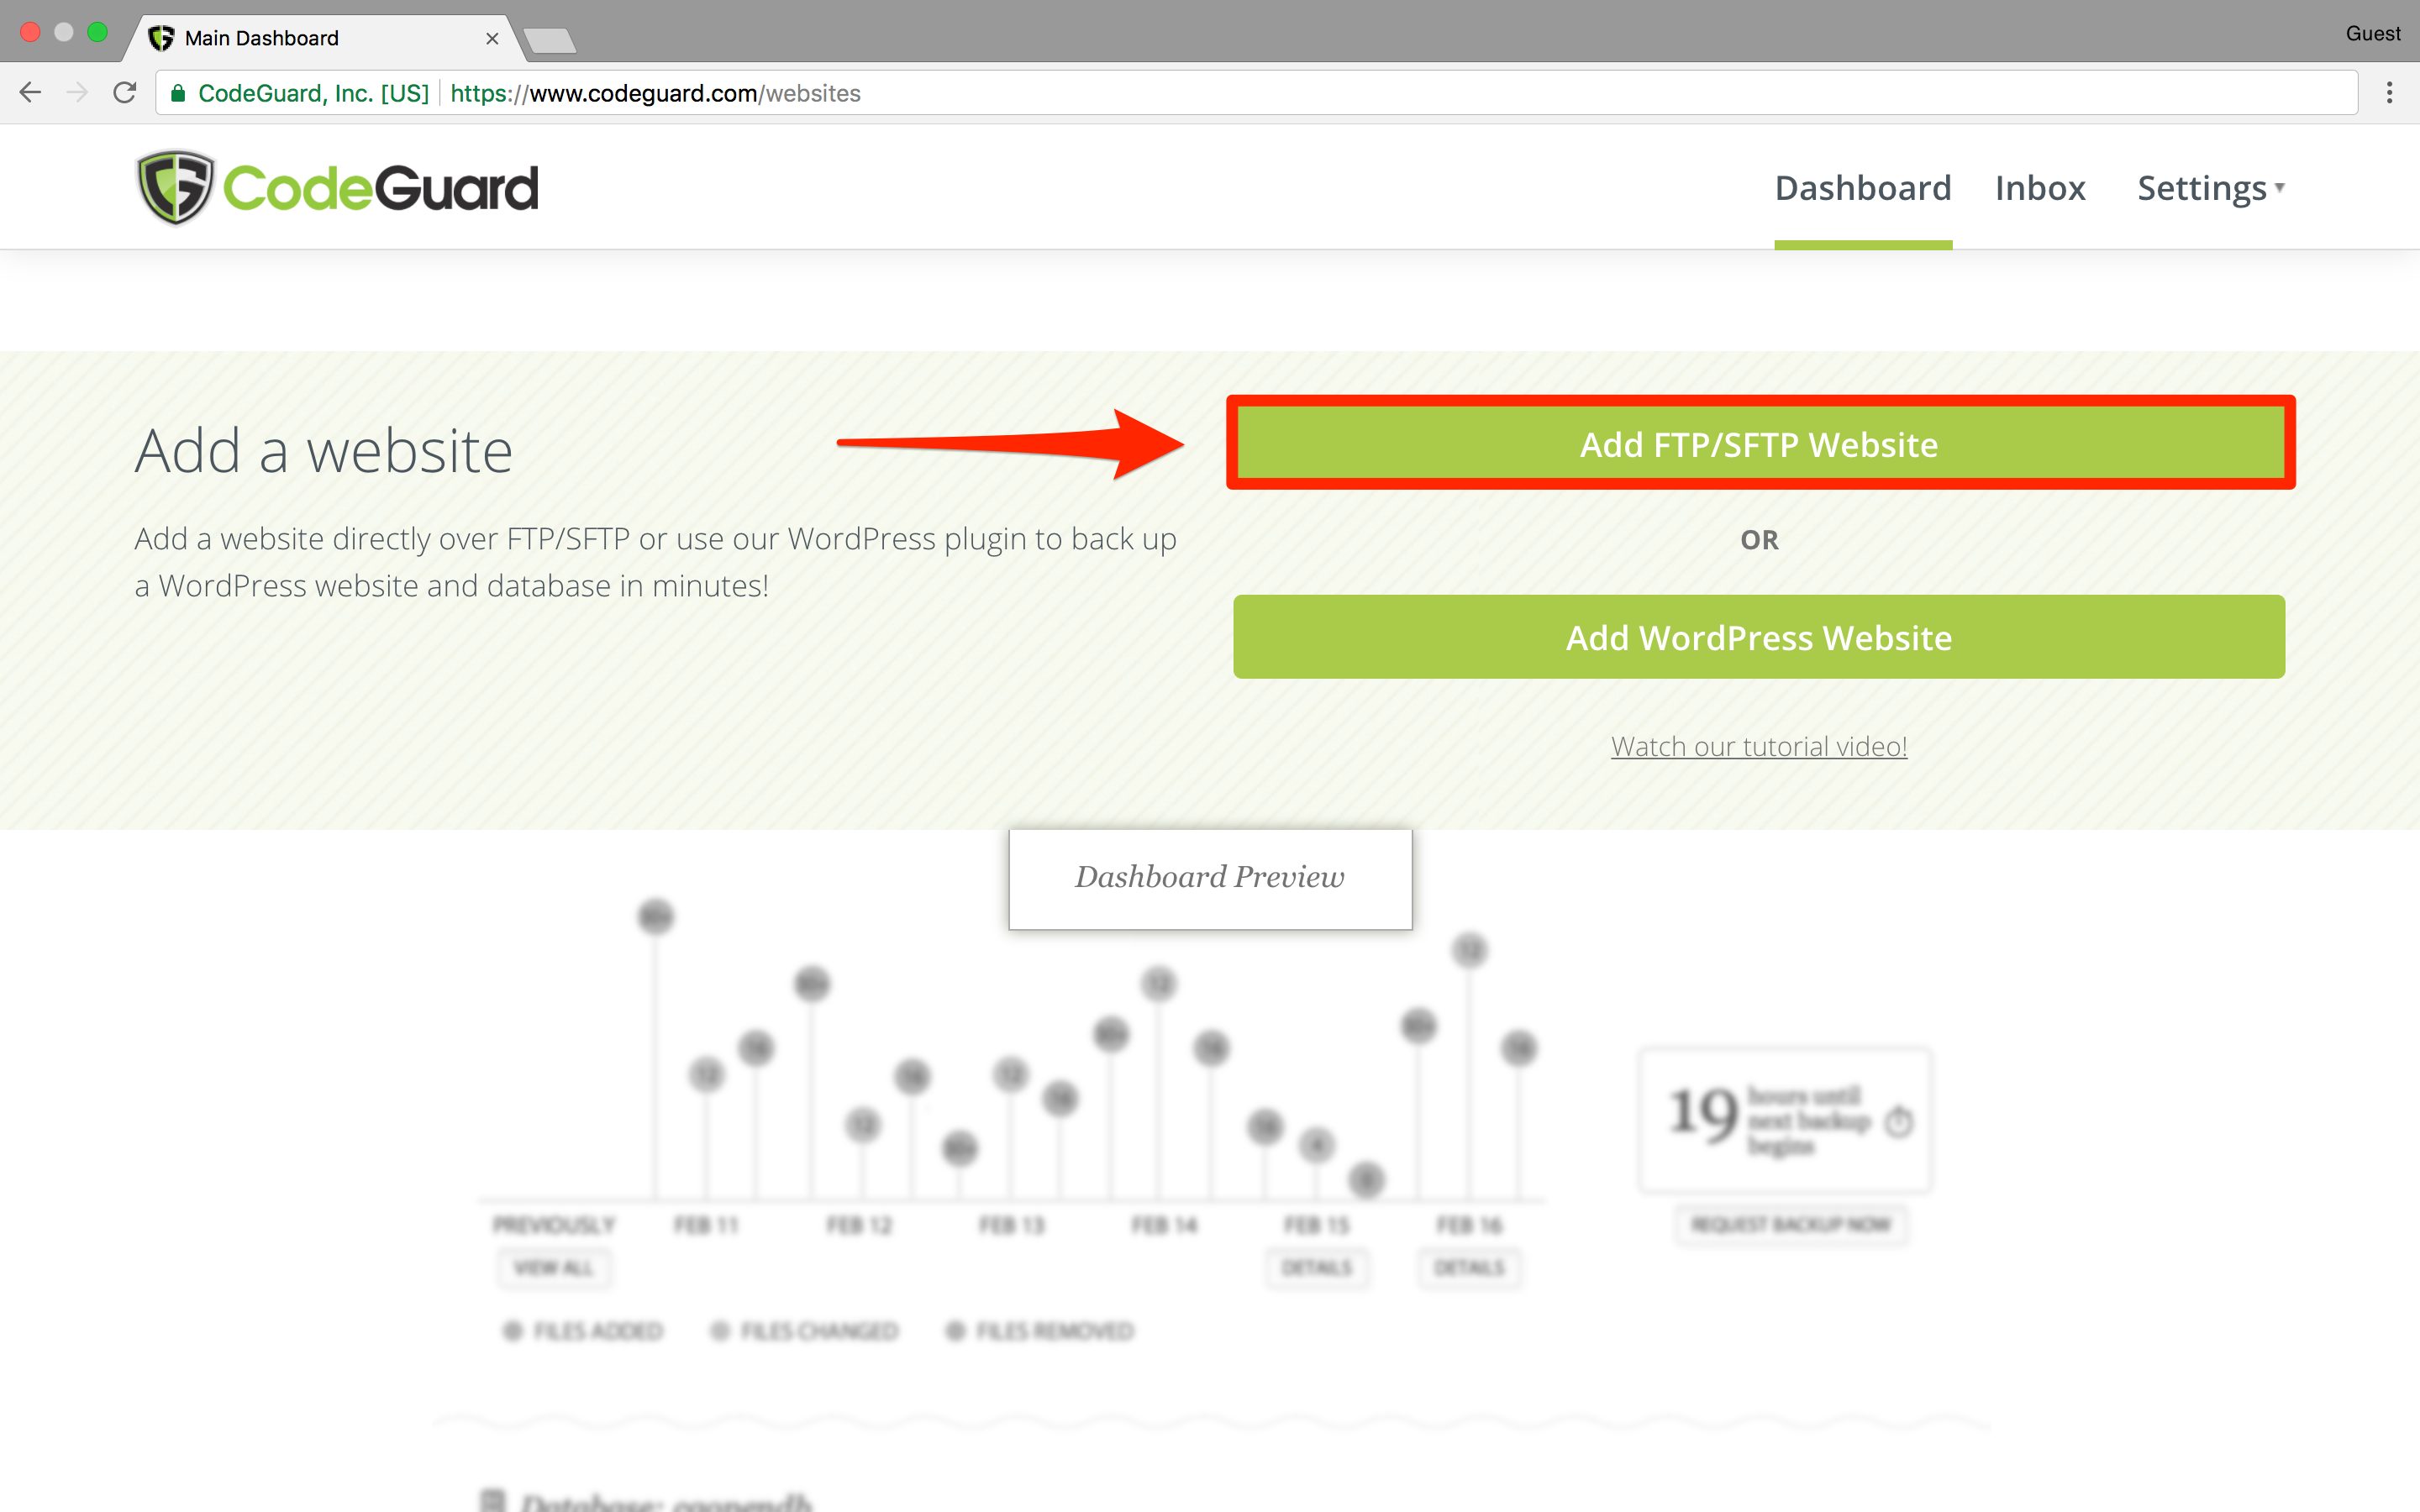
Step 1: Log in
Once you have gathered all the necessary information, log in to your CodeGuard account and click "Add FTP/SFTP Website".
Step 2: Enter your credentials
Using the credentials you collected earlier, enter them into the appropriate fields.
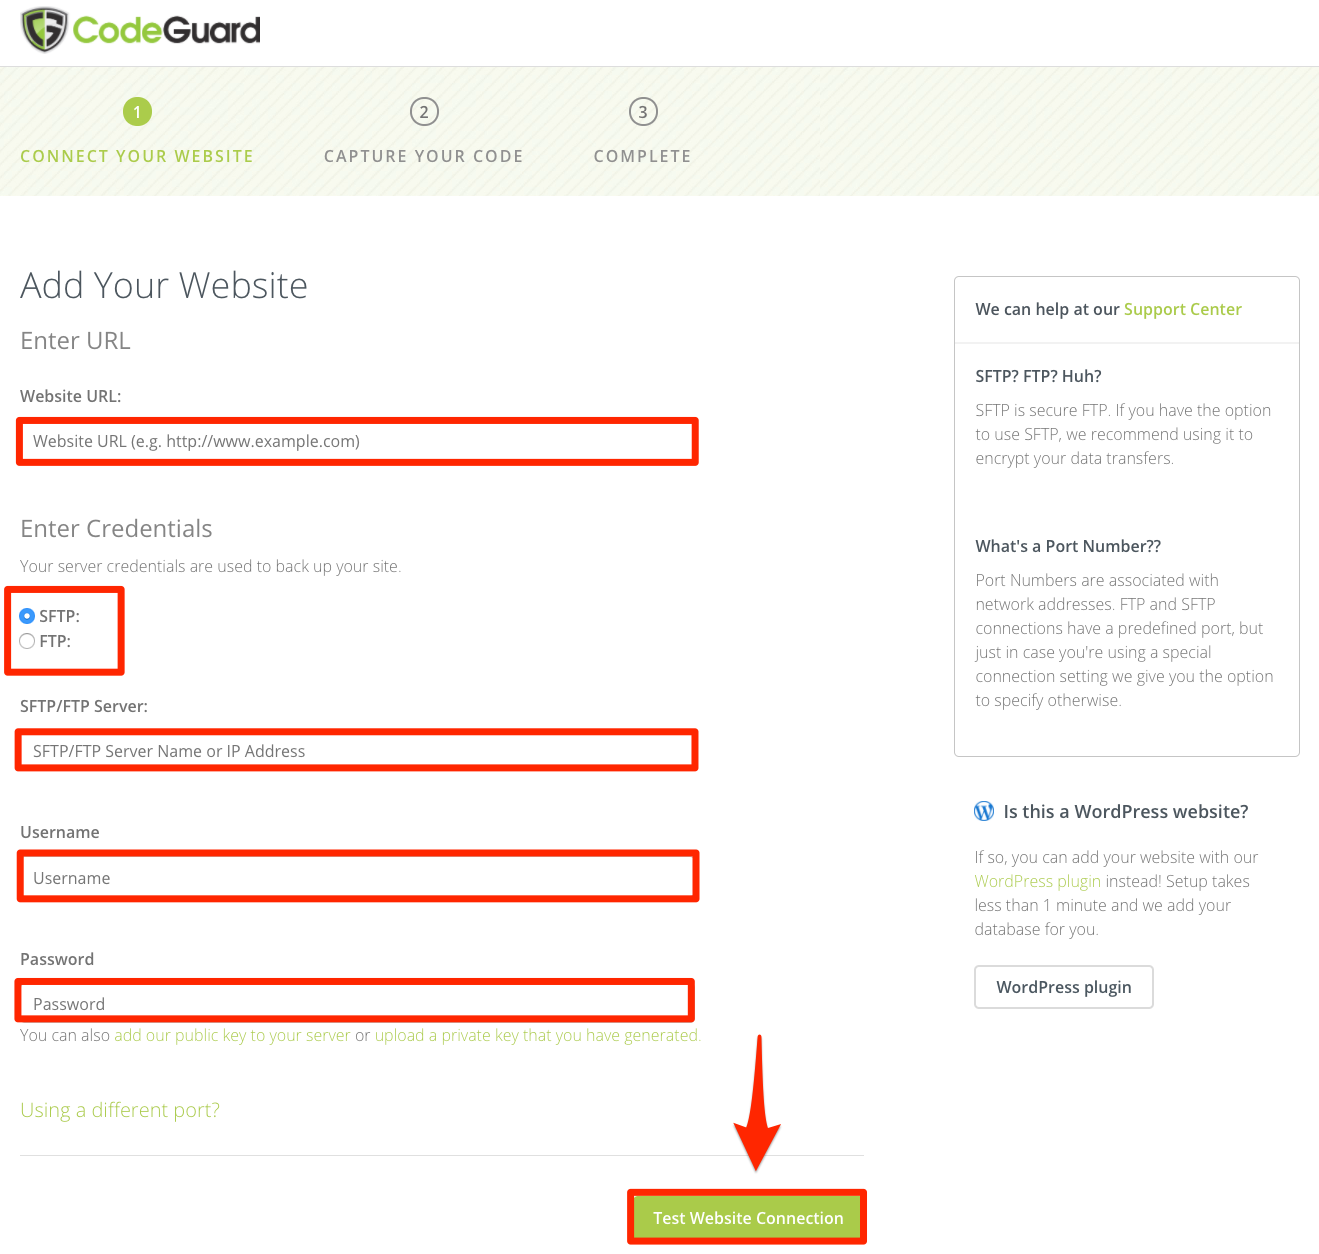
- Website URL: The URL of the website you are adding
- Protocol: Choose SFTP or FTP depending on the protocol you use to connect. The default port for SFTP is 22, and the default port for FTP is 21. If you are using a different port, click "Using a different port?" and enter the correct port.
- SFTP or FTP Server: The hostname or IP address of your SFTP or FTP server
- Username: SFTP or FTP username
- Password: SFTP or FTP password
If you want to add your website using a private key, click "upload a private key that you have generated" instead of entering a password. If you want to use our public key, click "add our public key to your server", and the public key will be generated.
After entering your credentials, click "Test Website Connection". If the credentials you entered are correct, you will be taken to the next step.
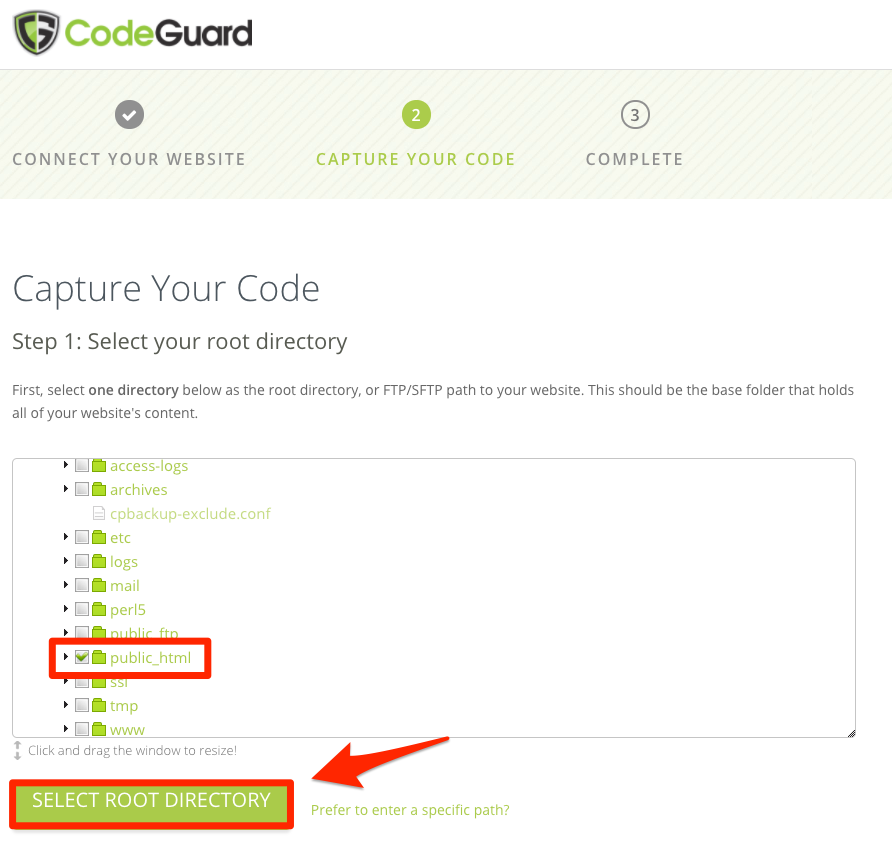
Step 3: Select the root directory
Click the checkbox next to the directory you want to use as your root directory. We recommend selecting the directory that contains all the files you want to back up. Please note that any new files/folders added to your root directory in the future will automatically be included in your backups. Once selected, click "SELECT ROOT DIRECTORY".
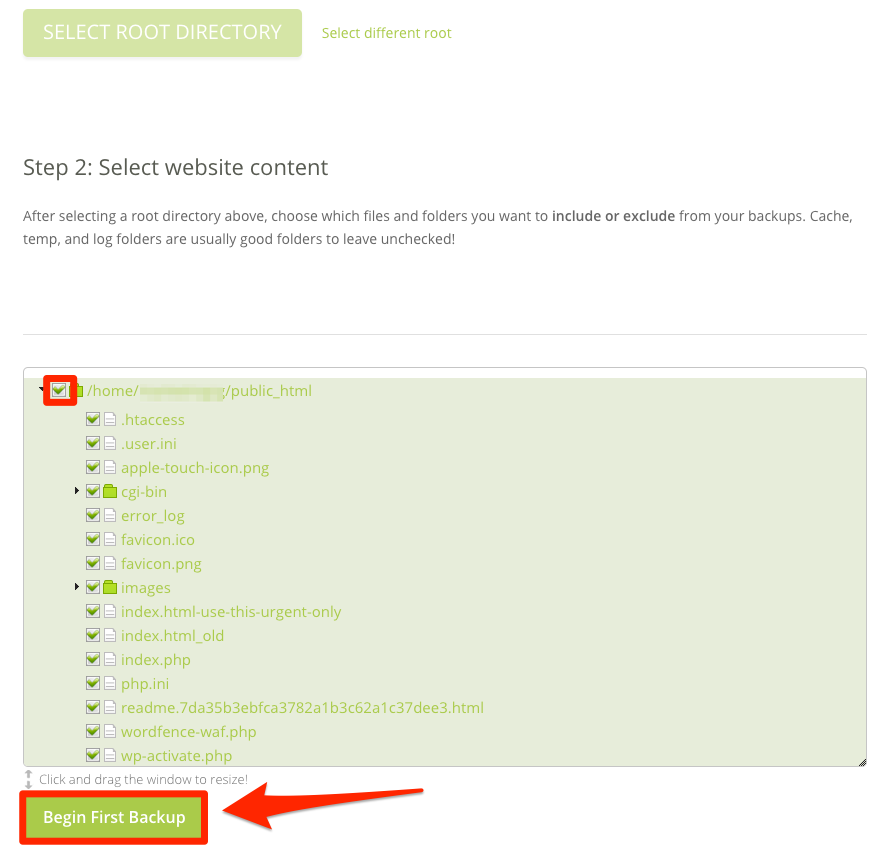
Step 4: Select content to back up
Scroll down to the next section and select the content you want to back up. To select everything in your root directory, simply click the checkbox next to your root directory. Selecting any folder will automatically include all of its contents. Then click "Begin First Backup".
Your website backup has now started! In the next step, you will be prompted to add a database. If your website uses a database, it is very important that you also back up the database.
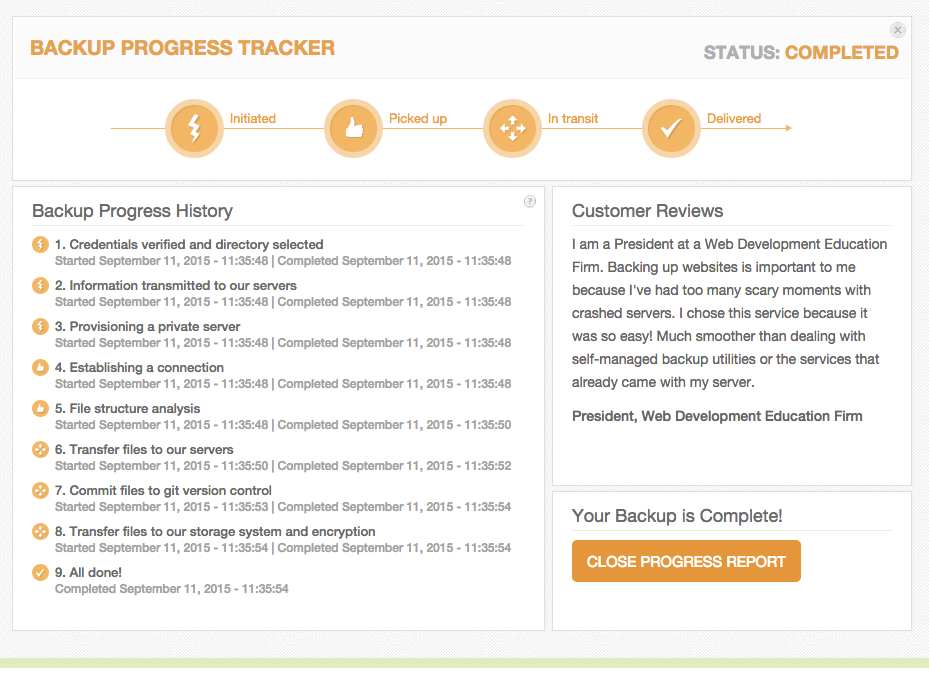
If you return to the dashboard, you will see a progress tracker indicating the status of your initial backup. Once the backup is complete, it will look like this:
If you have any questions, feel free to contact our support.
