Website loading speed is one of the most important factors for a good user experience and high search engine rankings. One of the fastest and most efficient ways to speed up your site is by activating GZIP compression.
This feature compresses (reduces the size of) your files (such as HTML, CSS, and JavaScript) on the server before they are sent to the visitor's browser. The result is drastically faster page loading with lower bandwidth consumption.
Here is how to activate this option in just a few clicks.
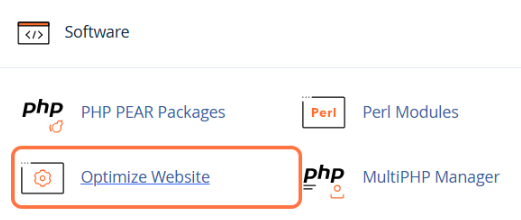
Step 1: Locate the optimization tool in cPanel
Log in to your cPanel account using these instructions.
Scroll down to the Software section or use the search field at the top.
Click on the Optimize Website icon.
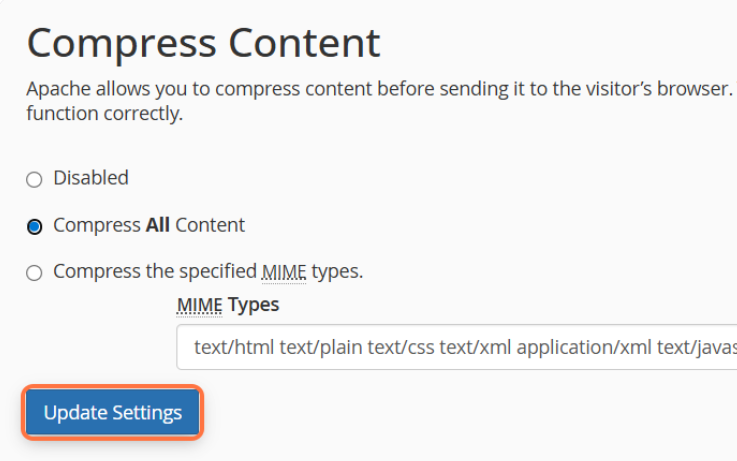
Step 2: Activate compression
Once you open the tool, you will see a simple interface with content compression options.
In the Compress Content section, select the Compress All Content option. This is the recommended setting that ensures the best performance for your site.
Click the Update Settings button to save the changes.
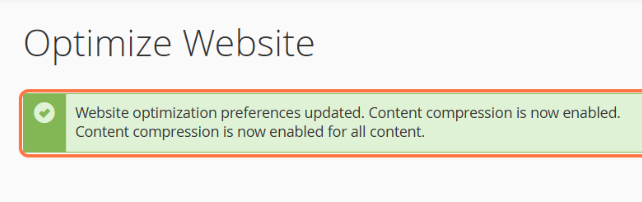
cPanel will immediately display a green message confirming that the settings have been successfully updated.
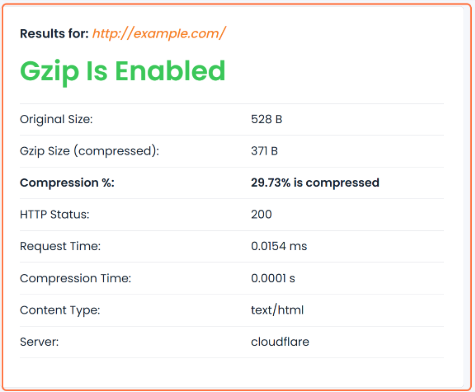
Step 3: Verify if GZIP compression is working
After activation, it is good practice to confirm that the server is indeed sending compressed files.
Open a free check tool, such as GiftOfSpeed GZIP Test.
Enter your website URL and run the test.

The tool will clearly show whether GZIP is successfully activated and exactly what percentage (and kilobytes) you have saved through compression.