After creating a hosting account or adding an addon domain, cPanel will automatically install an SSL certificate on your domain. The installation may take about 20 minutes if the domain has already propagated across the internet with our DNS servers. If the installation fails, cPanel will periodically attempt to reinstall the SSL.
If you wish to force the SSL certificate installation process or check its status, you can do it yourself through the cPanel platform by following these steps:
1. Log in to your cPanel account
2. Select the SSL/TLS Certificates option or find it using the "Search Tools" at the top of the cPanel home page

3. If the domain does not have an SSL certificate installed, you will see a red X inside the padlock icon. If the domain already has a valid SSL certificate, you will see a green padlock next to the domain name and the message A Let’s Encrypt certificate secures this domain.

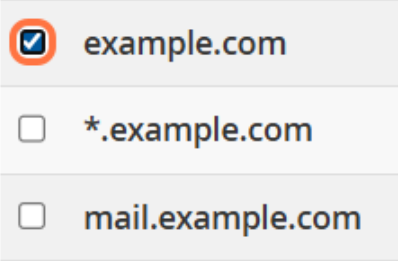
4. Check the box next to the domain (or subdomain) for which you want to install the SSL
The system will display a message on the right side: Running Domain Control Validation …
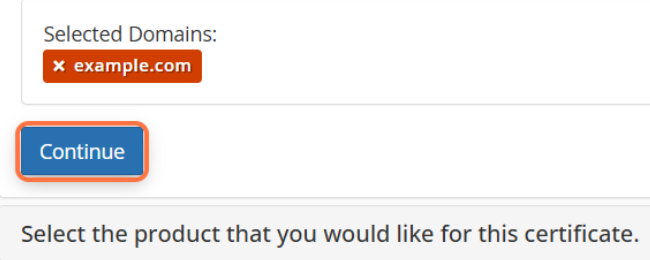
5. Click the Continue button at the bottom of the screen
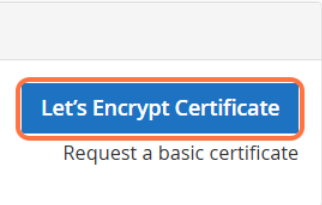
6. Click the Let’s Encrypt Certificate button
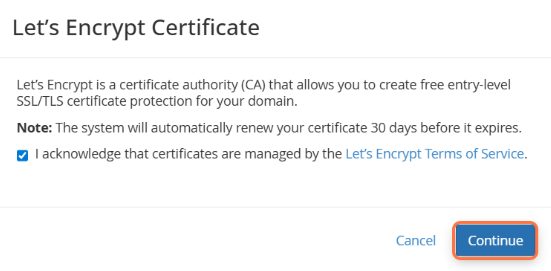
7. Check the box next to I acknowledge that certificates are managed by the Let's Encrypt Terms of Service and click the Continue button.
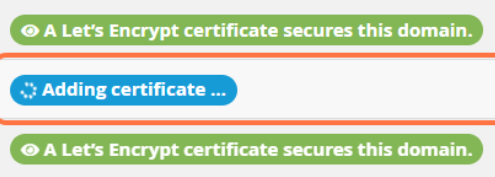
8. On the next page, you will see the notification Adding certificate ...
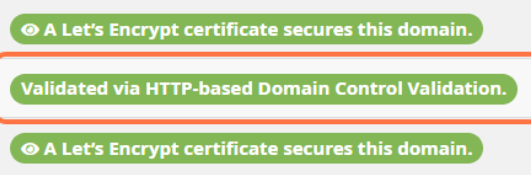
9. Once the installation is complete, you will see a green padlock icon next to the domain name and the notification: Validated via HTTP-based Domain Control Validation.
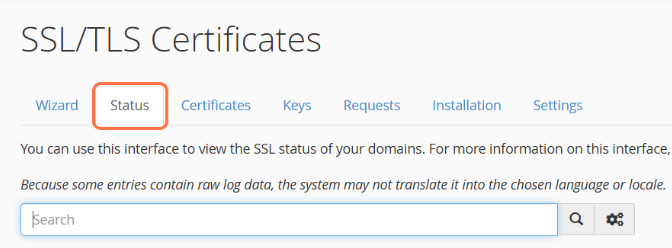
- If you want to check the domain status, you can click on the Status tab at the top of the page
- If everything is correct and the SSL certificate is successfully installed, you will see the following notice next to the green padlock to the right of the domain (subdomain): AutoSSL Domain Validated
- You can also see the certificate expiration date and a notice that the certificate will automatically renew via AutoSSL.

SSL Certificate Status Icons:
![]()
Next step...
After installing the SSL certificate, your next step should be ensuring the site always loads with SSL by setting up a redirection from HTTP to HTTPS.
NOTE: The system will fail to install the SSL certificate if the SkyHosting DNS servers are not set on the domain or if the domain propagation is not yet complete.
The SkyHosting DNS servers are as follows:
ns1.skyhosting.rs
ns2.skyhosting.rs
